Why cutting bread the wrong way makes it stale faster – and the bakery trick that keeps it soft
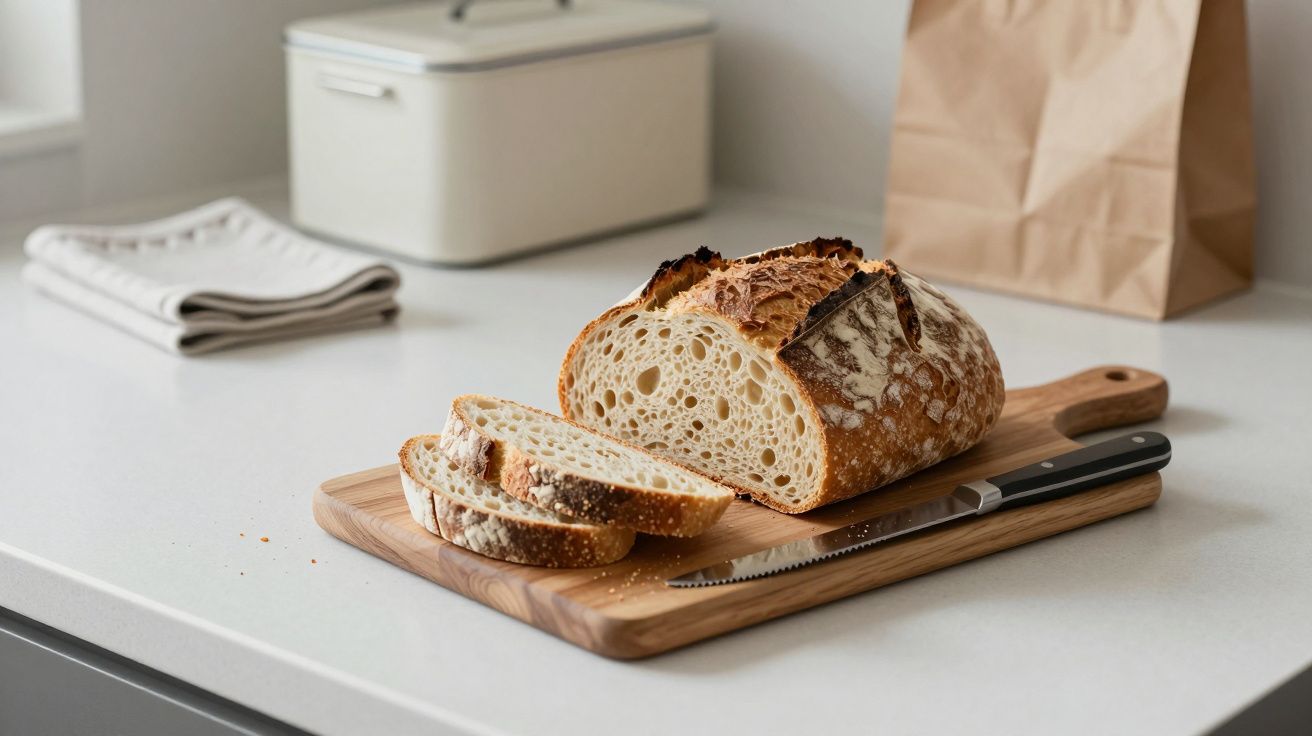
There’s a half‑collapsed loaf on the counter, the knife still out, a drift of crumbs heading for the edge like lemmings. Someone has hacked off two ragged slices from the end, left the cut face open to the air, and shoved the bag vaguely in its direction. By tomorrow it will be sulking: dry at the edges, oddly chewy in the middle, useful mostly as toast or croutons. We sigh, blame “cheap bread” or “British kitchens in winter”, and forget the quiet villain in the room: the way we cut it.
You can’t stop bread ageing; it’s full of starch and water and both have their own agenda. But you can make its short, glorious window of softness last a lot longer with one very small, very boring change. Your local bakery already knows this trick. They just don’t write it on the bag.
What actually makes bread go stale
We talk about bread “drying out”, as if it’s simply leaking water into the air. That’s only part of the story. A loaf stales mainly because the starch inside it slowly rearranges itself and pushes water away from the soft crumb and towards the crust and the air. The crumb turns firm and crumbly, the crust loses its snap and becomes leathery. The fridge accelerates this, which is why bakers wince when you say you store bread there.
Air matters too, but not quite how we think. The more of the soft interior you expose, the more surface there is for moisture to escape and for the crumb to harden. One big open face on a loaf behaves very differently to a row of tiny slice edges packed tightly together in a bag. The loaf that looks “tidy” in the moment may well be the one that punishes you two days later at breakfast.
Bakeries work with this knowledge all the time. They know the same dough can be sold as a crusty boule, a sliced tin loaf, or rolls, each with a different shelf life, simply because of surface area and how quickly moisture can shuffle around. The way you cut at home either respects that work or undoes it.
The wrong cut: why “heel first” sells your loaf short
Most of us attack from one end. We lop off the crusty heel, then keep slicing further in, leaving one wide, soft face open as we go. That single cut side becomes a motorway for moisture to escape and for the crumb to firm up. Wrapped in a bag with air still in it, the process speeds along nicely.
By the time you reach the middle of the loaf, yesterday’s slices are noticeably older than today’s. The ends may be tough, the centre slightly dry, and the last few slices end up destined for breadcrumbs or guilt. The bread didn’t “turn” on you; you just gave it every incentive.
There’s another quiet problem: the more you saw through the loaf from one end, the more you squash it. Even with a serrated knife, pressed hands and impatience can compress the crumb, making it denser and less airy. Once you’ve squashed those bubbles, they don’t bounce back, so the texture feels older than it is.
The bakery trick: keep the crumb hidden
Here’s the move many bakers use at home: stop leaving the soft middle exposed. Instead of working from one end to the other, you cut two slices from the centre, take what you need, then push the two cut faces back together so the loaf effectively seals itself.
You’re creating a protective crust “cap” at both ends and keeping the delicate crumb sandwiched inside. Less crumb meets the air, moisture leaves more slowly, and the remaining loaf stays softer for longer. The outside can go a touch firmer while the inside still feels fresh enough for proper sandwiches, not just toast.
Visually, it feels odd the first time – a loaf with a missing middle, now reunited – but you get used to it quickly. The main effort is simply remembering to do it before someone takes a wild slice off the end and ruins your grand plan.
How to cut bread so it stays softer
Think of this as a tiny ritual rather than a rule. It takes under a minute and changes two or three days of sandwiches.
Start in the middle, not at the heel
Put the loaf on its side if it’s tall, or bottom down if it’s a squat sourdough. Make a clean slice somewhere near the centre. Slice again to get the number of pieces you need. Keep your hand light; let the serrated knife do the work so you don’t crush the crumb.Rejoin the loaf
When you’ve taken your slices, push the two larger chunks of loaf together so that the cut faces meet. You’ve basically rebuilt the bread, only slightly shorter. This puts crust back on the outside and crumb back on the inside, where it’s happiest.Wrap to suit the bread
- Crusty sourdoughs and baguettes prefer breathable wrapping: a paper bag, a clean cotton bag, or a tea towel.
- Softer sandwich loaves like semi‑sealed conditions: a plastic bag that isn’t fully tight, or a bread bin that closes but isn’t airtight.
- Crusty sourdoughs and baguettes prefer breathable wrapping: a paper bag, a clean cotton bag, or a tea towel.
In both cases, you’re protecting the cut surfaces while avoiding a sweaty environment that turns crust rubbery.
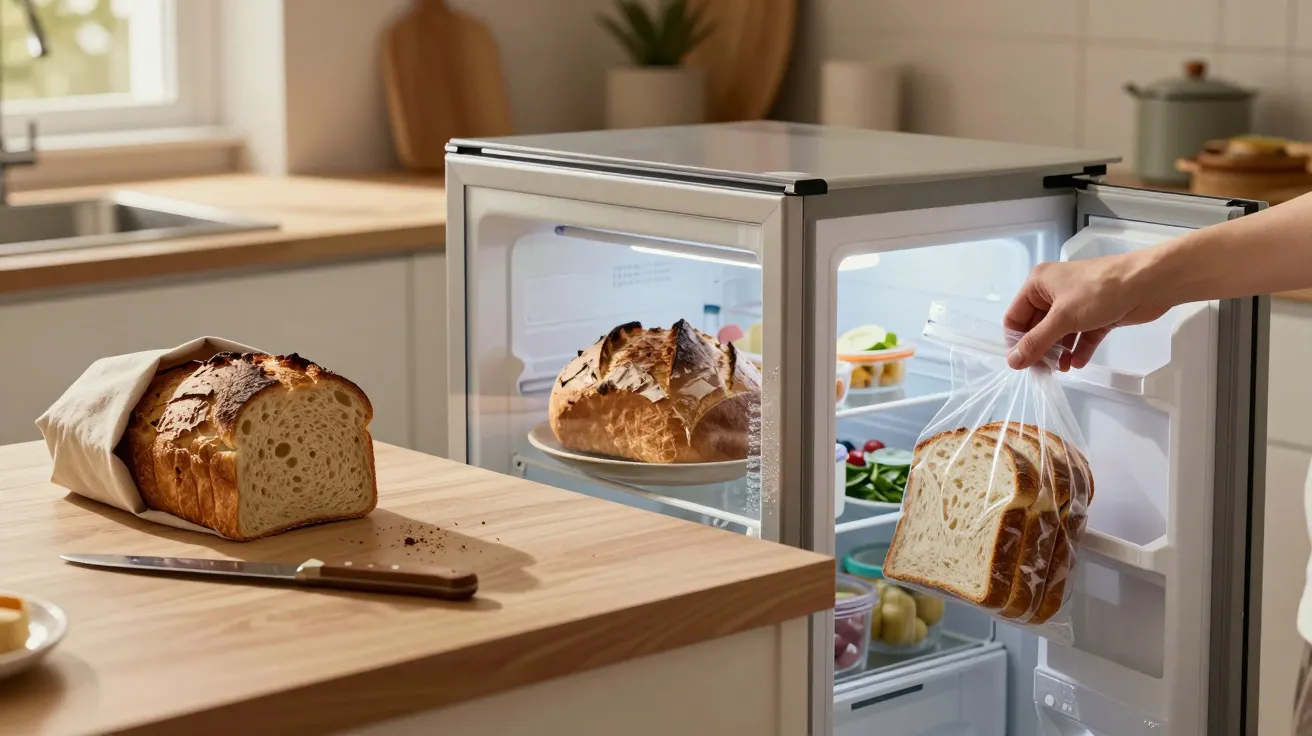
Store at room temperature, not in the fridge
A cool, dry cupboard or bread bin is perfect. Fridge temperatures push starch to recrystallise faster, so bread goes firm and stale more quickly even if it doesn’t look dry.Slice only what you’ll eat soon
Every slice you cut is a new surface that starts its own staling clock. Leave the rest intact until you need it.
Why this works: a bit of kitchen‑table science
When bread comes out of the oven, starch molecules are gelatinised and water is held within a network of gluten and little gas pockets. As the loaf cools and sits, those starches slowly recrystallise in a process bakers call retrogradation. Water migrates, structure tightens, crumb firms up. This happens whether you cut it or not.
What cutting changes is speed and feel. More exposed surface area means more routes for moisture to escape and more crumb directly in contact with air, which dries the outer layers faster. When you press two cut faces together, you drastically reduce that direct contact. Some of the moisture that would have floated off has more time to redistribute inside the loaf instead.
Crust and crumb like different climates. Crust wants a bit of air to stay crisp; crumb wants a gentle, humid pocket. By rebuilding the loaf and choosing the right wrapping, you’re quietly giving each part the conditions it prefers, using nothing more exotic than a knife and some folding.
What about pre‑sliced bread and freezing?
Shop‑bought sliced loaves are already built for a longer life. They often contain fats, emulsifiers, or enzymes that slow staling, and the slices are packed tightly in the bag, so their cut faces mostly touch each other rather than open air. Once you open the bag, press it gently around the loaf and squeeze out excess air before resealing. That simple squeeze keeps the slice stack acting like one joined loaf.
Freezing is your real pause button. If you know you won’t finish a fresh loaf within a couple of days, slice what you need, then freeze the rest in portions. Wrap firmly in a freezer bag with as little air as you can manage. Most bread can go straight from frozen to toaster; larger slices benefit from a brief thaw on the counter before grilling or toasting.
The same centre‑cut trick still helps before freezing. Two big joined chunks wrapped together will usually thaw more evenly and feel closer to fresh than a lonely heel plus a stack of exposed slices.
Small changes that make bread days nicer
You don’t need to buy a special bread bin, a linen bag embroidered with wheat, or a chef’s knife that costs more than your rent. You need three low‑effort habits: cut from the middle, rejoin the loaf, and stash it somewhere cool and dry. That’s it.
The reward is a quieter kind of satisfaction: the last sandwich of the loaf still soft enough to fold, toast that browns evenly instead of welding along old dry edges, fewer ends guiltily thrown to the ducks. It’s not about perfection; it’s about getting one of the simplest foods we buy to behave a little more kindly.
Quick reference: cutting and keeping bread
| Habit | What you do | Why it helps |
|---|---|---|
| Cut from the middle | Slice from the centre, then push halves together | Keeps crumb protected, slows staling |
| Choose wrapping by crust | Paper/cloth for crusty; semi‑sealed bag for soft | Balances crisp crust with soft interior |
| Avoid the fridge | Store in a cool cupboard or bread bin | Slows starch retrogradation, keeps texture better |
FAQ:
- Does this trick work with shop‑bought sliced bread? It helps a bit, but those loaves are already sliced and formulated to last. Your best bet is squeezing out excess air, resealing tightly, and freezing what you won’t eat within a couple of days.
- What about baguettes and very crusty loaves? They go stale quickly whatever you do, but cutting in the middle, pressing the halves together, and wrapping in a cloth or paper bag will usually buy you an extra day of decent eating.
- Is a bread bin worth it? A simple bread bin or lidded box gives a stable, dark, draught‑free space that suits most loaves. It’s not magic, but combined with better cutting, it makes a noticeable difference.
- Can I freshen stale bread in the oven? Lightly sprinkle the crust with water, pop the loaf into a hot oven for 5–10 minutes, and eat it soon after. Heat softens the crumb and re‑crispens the crust, but the effect is temporary.
- Why does my bread go mouldy instead of stale? Warm, damp kitchens and very tight wrapping trap moisture, which mould loves. If mould is a frequent guest, wrap a touch looser, use a breathable container, and buy or bake smaller loaves more often.


Comments (0)
No comments yet. Be the first to comment!
Leave a Comment