Why your freshly painted wall looks patchy – and the roller loading secret decorators teach apprentices
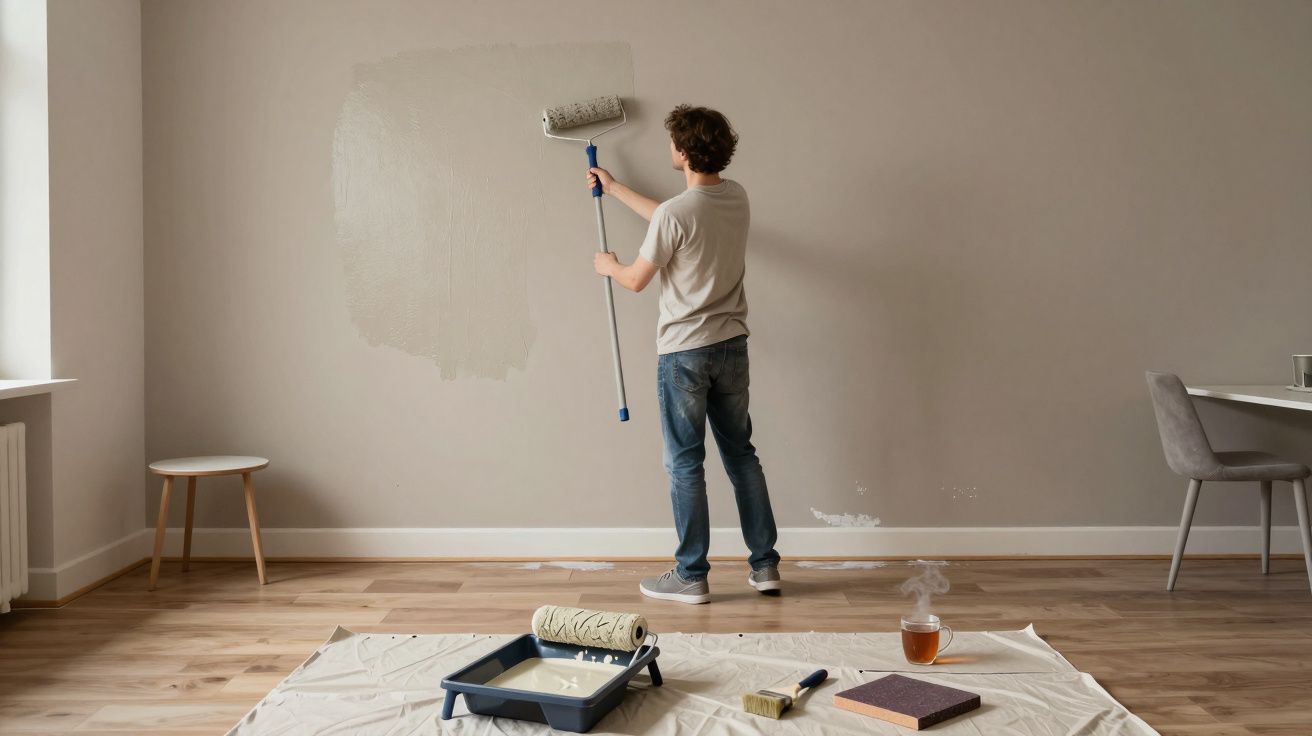
The first time you step back from a “finished” wall and see stripes, clouds and dull patches, it feels personal. You bought decent paint, you used a roller, you even put dust sheets down. Yet under normal light the surface looks fine, and under the evening lamp it suddenly resembles a badly ironed shirt. The truth is rarely that the paint is rubbish. It’s usually that the roller was.
Freshly painted walls go patchy for boring reasons: uneven film thickness, thirsty plaster, poor lighting, and a roller that was either underloaded, overloaded, or used like a paint mop. Professional decorators talk about loading a roller the way chefs talk about seasoning. It’s a small, repeatable habit that quietly decides whether the job looks cheap or expensive.
What most DIY guides skip is the middle part between “dip the roller in the tray” and “roll on the wall”. That middle part is where the cloudiness, banding and shadowy rectangles are born.
The three main reasons your wall looks patchy
On a typical domestic job, patchiness tends to come from a mix of three culprits working together.
1. Uneven absorption in the wall
New plaster, filled areas and old paint don’t drink at the same speed. A bare filler patch can pull the moisture from paint so fast that colour and sheen die in that spot, leaving a dry-looking halo when the rest of the wall has a soft, even finish.
If you painted straight onto bare plaster with “mist coat” made up on the fly, or if you skipped sealing filler spots, you’ve essentially created a patchwork of surfaces under one colour. Under daylight it might pass. Under raking light from a side window, every difference in porosity is framed.
2. Roller marks and lap lines
Those pale vertical stripes where each “lane” of rolling overlaps the next are lap lines. They appear when one strip of paint has already started to dry before the fresh strip was blended into it. The eye doesn’t see colour difference so much as difference in sheen and texture.
Turn on that one unforgiving ceiling light and you’ll see it: a slightly shinier band where you were heavy-handed and a flatter, duller band where the roller was running dry. Once dry, you can’t polish this away. The only fix is another coat, applied with better timing and a better-loaded roller.
3. The roller wasn’t loaded (or emptied) properly
A roller that’s dipped and slapped on the wall without using the tray properly leaves you with extremes: sopping wet edges that sag and orange-peel, and a dry centre that scrubs paint off as fast as it puts it on. Ten minutes later you have one area that looks saturated and rich and another that looks chalky.
Pros don’t “dip and hope”. They load, even out, work a section, then re-load before it starts to drag. The roller is never allowed to go bone-dry on the wall. That’s the decorator’s version of sharpening a knife: quiet, constant, non-negotiable.
The decorator’s roller loading routine (the secret they drill into apprentices)
Watch a decent decorator for five minutes and you’ll see a rhythm: tray, wall, overlap, tray, wall, overlap. It looks casual, but there’s a pattern they could almost do with their eyes shut.
Here’s the version apprentices get taught, minus the swearing.
Step 1: Start with the right kit
A good finish starts before the tray ever sees paint.
- Use a proper roller frame and sleeve, not a bargain-bin foam thing meant for arts and crafts.
- For most UK plastered walls with emulsion:
- 9–12 inch roller.
- Medium pile (about 9–12 mm) microfibre or knitted polyester.
- Use a rigid tray with a decent ramp, or better, a deep tray with a metal grid (scuttle).
Thin, bendy trays flex when full, and that wobble alone creates thin and thick patches before you’ve touched the wall.
Step 2: Prime the new sleeve
A brand-new roller sleeve is like a dry sponge. If you slam it straight into thick paint, it soaks badly and sheds fibres.
Fill the tray about a third with paint, put the clean sleeve on the frame, and:
- Dip the roller very lightly in the paint, about a quarter of the way up.
- Roll it up and down the tray ramp or grid 10–15 times.
- Rotate the roller slightly as you go, so all sides get coated.
- Repeat this light dip and roll a couple of times.
The goal is a uniformly damp roller with no visible dry patches and no thick blobs. It should look glossy and evenly coloured, but not dripping.
Step 3: Load, then level
Loading is getting paint onto the roller. Levelling is getting excess paint back off in a controlled way so the nap is uniformly charged.
The pattern looks like this:
- Dip the roller into the paint, about half to two-thirds of the nap depth.
- Lift it and immediately roll up and down the ramp or grid, moderate pressure, 6–8 passes.
- If you see paint lines or ridges on the sleeve, keep rolling until they vanish.
- The roller should now look uniformly wet with a soft sheen, no sags, no bare sections.
A correctly loaded roller feels heavier but not waterlogged. If you tilt it, paint shouldn’t drip off the ends. Apprentices are taught: if it’s dripping before it hits the wall, it’s overloaded; if it sounds like Velcro on the wall, it’s underloaded.
Step 4: Work small sections, keep a wet edge
Patchiness loves a dry edge. The cure is to work in manageable panels, keeping your overlap areas wet enough to blend.
- Think in zones about 1 m wide by ceiling to skirting tall.
- Start 10–15 cm away from the corner rather than ramming the roller right into it.
- Roll an “M” or “W” shape to spread paint, then fill in, then smooth with long, light passes.
Every 3–4 passes, pay attention to the feel. As soon as the roller begins to drag, squeak or leave faint lines instead of a rich film, go back to the tray. Don’t try to “stretch” what’s on the sleeve to squeeze out another half-square metre. That stretching is how you write patchiness into the wall.
Step 5: Finish with light, one-direction passes
Once a section is covered, decorators “lay off” the paint.
- With the roller barely pressed against the wall, make slow, straight passes in one direction (commonly top to bottom).
- Overlap each pass by about a third.
- Lift the roller off gently at the end of each stroke rather than snapping it away.
This lays the paint film to a consistent thickness and lines up the texture of the nap. Under side lighting, you see a uniform, soft pattern rather than chaos.
Common DIY mistakes (and what pros do instead)
Many patchy walls can be traced to the same handful of habits. Change these and you fix 80% of the problem before touching primers or special paints.
| Mistake | What happens | Pro habit instead |
|---|---|---|
| Overfilling the tray | Roller gets dunked, ends drip, centre stays hungry | Fill tray 1/3–1/2, load in stages, level on ramp |
| Rolling until the sleeve is almost dry | Scrubby, thin patches and lap marks | Reload as soon as feel changes; never “stretch” paint |
| Random rolling directions | Texture catches the light unevenly | Finish sections with straight, consistent lay-off strokes |
| Mixing cutting-in and rolling slowly | Edges dry before rolling reaches them, leaving picture frames | Cut-in one wall at a time and roll that wall immediately |
| Skipping primer on bare plaster/filler | Wall drinks unevenly, colour and sheen blotchy | Mist coat or primer sealer, plus spot-priming repairs |
When the wall itself is the problem
Sometimes the roller routine is fine, and the surface underneath is sabotaging you.
Thirsty or inconsistent plaster
New plaster needs a mist coat: usually 60–70% paint, 30–40% clean water (always check the tin). That thinned coat soaks in and evens out absorption so your next coats behave.
If you’ve already gone straight on with neat paint and the first coat looks blotchy:
- Let it dry fully.
- Apply a dedicated sealer or high-quality trade emulsion thinned slightly as an intermediate coat.
- Then do your finish coat(s) with normal loading and technique.
Filler and patch repairs
Spot-filled areas act like little sponges unless you seal them.
- Sand filler smooth.
- Dust it off.
- Prime those spots with either:
- a quick-drying primer, or
- a little of your wall paint, thinned slightly, applied in two light coats.
Only then roll the main coat, keeping the roller well loaded as you pass over repairs. If you can see the outline of a filler patch after the first coat, don’t panic; you’re looking at sheen and texture differences more than colour. Another proper coat usually levels it.
Light that shows every flaw
Side light from a low winter sun or a wall of downlights will reveal sins you never saw at midday. In trade, this is “raking light”, and decorators actively check under it, not shy away.
If the wall passes under normal, lived-in lighting, you may decide to leave it. If not:
- Sand dust nibs or obvious ridges lightly.
- Wipe down.
- Recoat the entire wall in the same direction you intend the light to hit, keeping a scrupulously wet edge and consistent lay-off strokes.
A simple two-coat plan that actually works
If you want a practical sequence that reduces the odds of patchiness on most domestic walls, it looks like this:
- Prep and prime
- Fill, sand, dust.
- Mist coat new plaster, spot-prime filler.
- First full coat
- Cut in one wall.
- Immediately roll that wall in sections, using the loading routine and laying off.
- Move to the next wall, repeating the pattern.
- Second full coat
- Lightly de-nib any raised bits with fine sandpaper.
- Repeat the same order, same roller, same technique.
- Avoid stopping halfway up a wall; finish full surfaces.
By the end of the second properly applied coat, even fussy side lighting has very little to grab onto. The film thickness is even, the texture of the roller is aligned, and the wall starts to look “like the photos” rather than a weekend experiment.
How to rescue a patchy wall without starting again
If you’re already staring at clouds and stripes, you don’t always need to sand back to bare plaster.
Mild patchiness, same colour:
One more full coat, applied wall by wall with good loading and lay-off, usually fixes it. Resist the urge to “touch in” individual patches; that nearly always makes them worse.Severe banding or picture framing:
Lightly sand ridges where overlaps or brush marks are obvious, dust off, then give the whole wall two coats, not one. Think of it as resetting the surface rather than chasing each fault.Old, chalky walls or drastic colour change:
Consider a high-opacity trade undercoat or a dedicated wall sealer between what you have and what you want. It evens out both colour and suction, so your topcoat behaves like it’s on a new wall.
Apprentices are reminded of one blunt rule: you can’t spot-fix a patchy finish with more patches. You fix it with complete, even coats and a roller that’s doing its job properly.
The quiet skill that makes a wall look expensive
Good painting is less about exotic products and more about boring consistency. Same pressure, same speed, same overlap, same loading routine, coat after coat. The roller becomes a tool for laying down a controlled film, not a sponge you’re trying to wring every last drop from.
Once you’ve felt the difference between a dry, scratching roller and a correctly loaded one that glides and leaves a uniform sheen, you don’t go back. The wall stops fighting you. The light stops exposing you. And the finish starts to look less “DIY on Sunday” and more like someone who knew the secret stood there quietly, rolling, reloading, and never once tried to stretch that last half-metre.


Comments (0)
No comments yet. Be the first to comment!
Leave a Comment